

Quick Start Guide PREMO Maintanace
Disclaimer: The user is required to observe and adhere to the currently applicable instruction manuals for all Vemaventuri products utilized.
Step 1: Preperation
Lay out all parts from the Maintenance Kit:
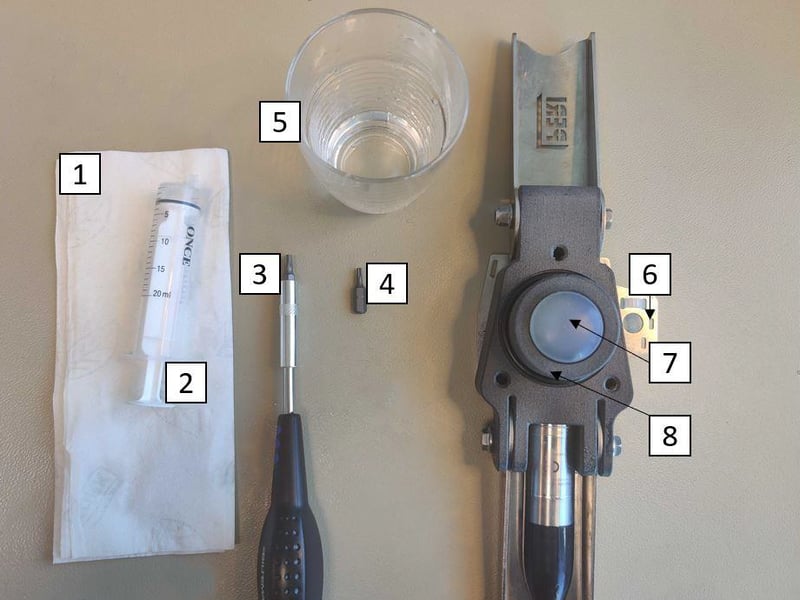
1) Cleaning cloth
2) Syringe without needle (approx. 20 ml)
3) Screwdriver (TORX T15)
4) TORX bit T10
5) Glycerol
6) Base plate
7) Membrane
8) Screw ring with O-ring
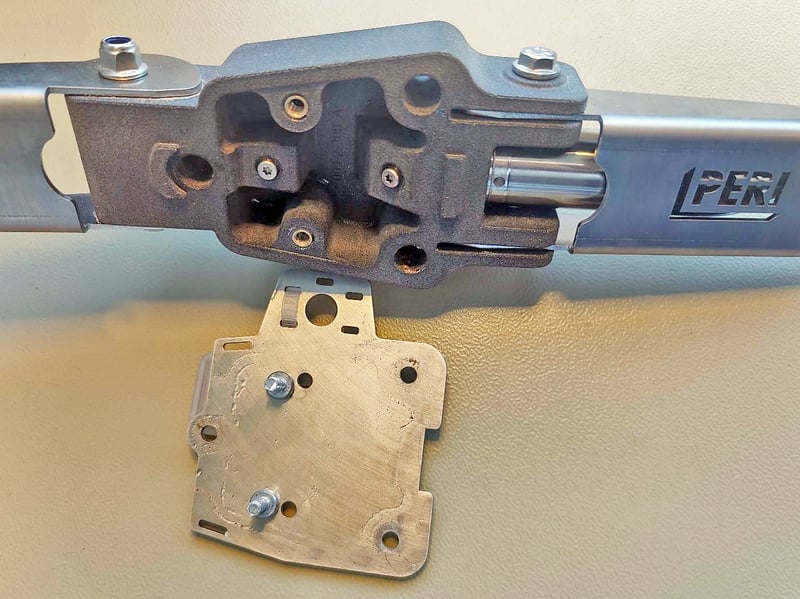
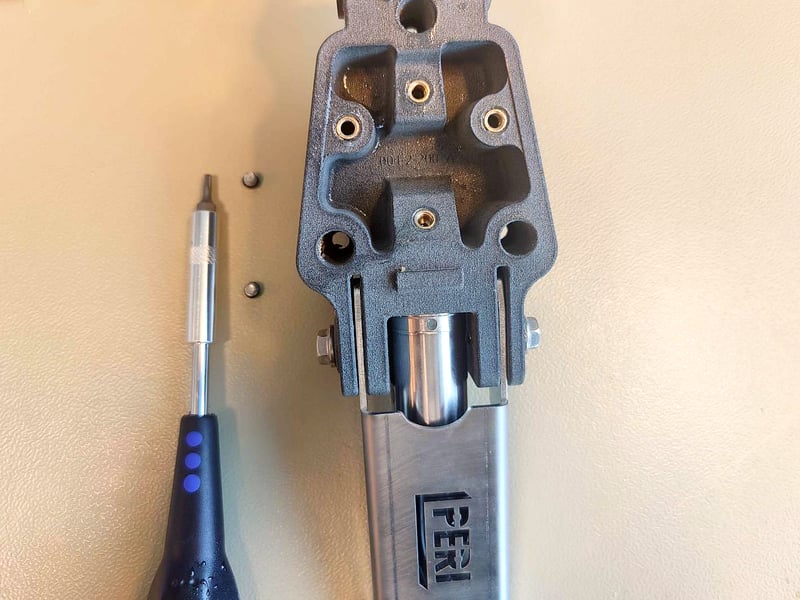
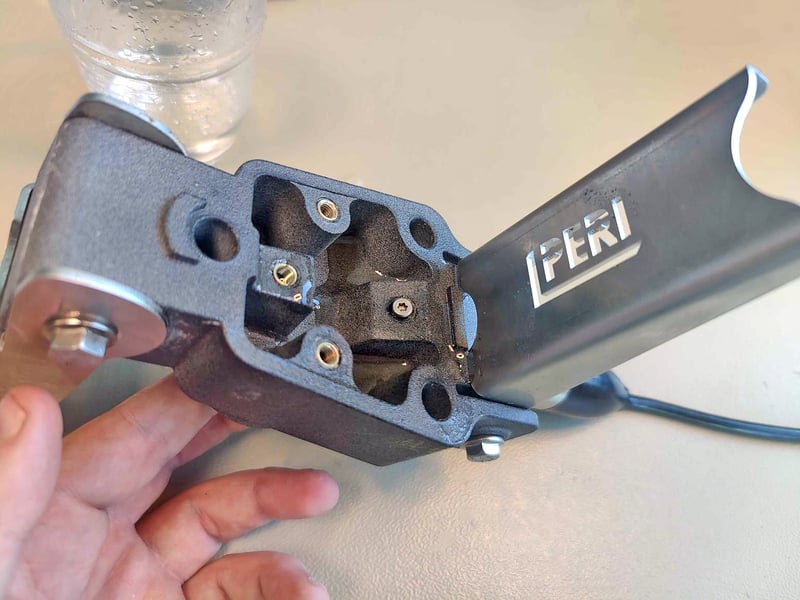
Step 2: Open & Disassemble
-
Unscrew and remove the base plate.
-
Clean the inside and outside of the housing if necessary.
-
Remove the bleed screws.
Step 3: Drain Old Glycerol
-
If the membrane is not ruptured, pour the glycerol through the vent holes into a container.
-
Gently press the membrane to push out remaining glycerol.
(Glycerol may be reused if it is clear and clean.)
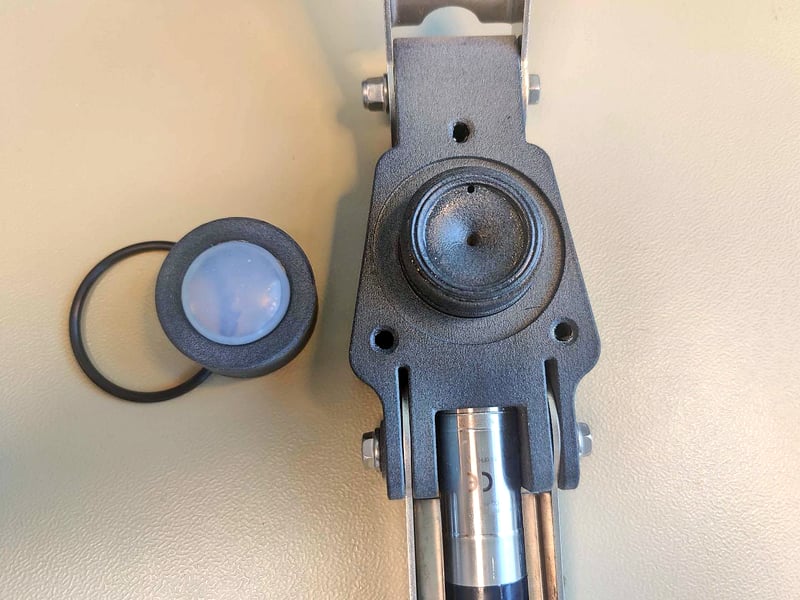
Step 4: Replace Membrane & O-ring
-
Unscrew the screw ring by hand (counterclockwise).
-
Remove the old or damaged membrane.
-
Clean the screw ring.
-
Insert the new membrane.
-
Inspect the O-ring and replace it if worn or damaged.
-
Lightly clean the threads of the screw ring and sensor housing.
-
Screw the ring onto the sensor housing and tighten by hand
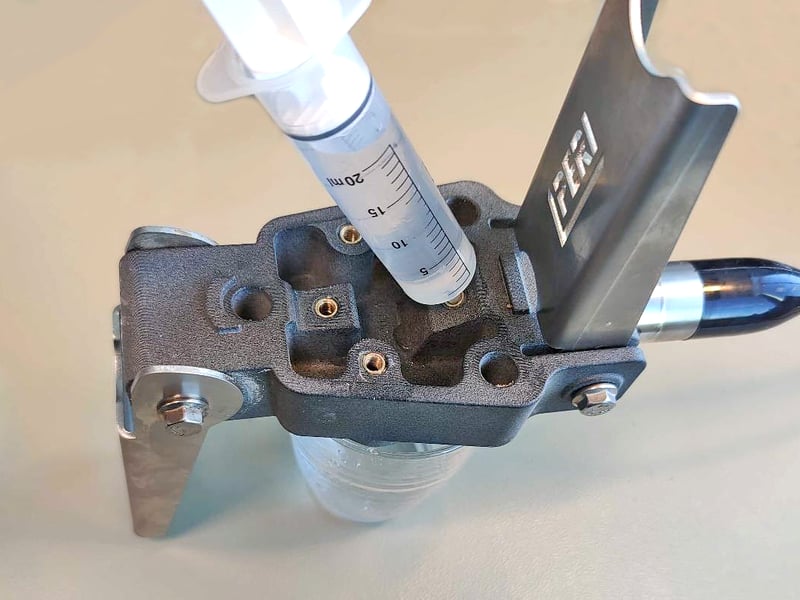
Step 5: Refill with Glycerol
-
Fill the syringe with glycerol without introducing air bubbles.
-
Hold the sensor housing horizontally and insert the syringe into the hole closest to the pressure transducer.
-
Fill with glycerol until it emerges from the vent hole.
Step 6: Venting / Remove Air Bubbles
-
Remove the syringe and close the opening with a bleed screw. Leave the second opening open.
-
Tilt the unit horizontally at approx. 45°, with the pressure transducer at the bottom.
-
Gently press the membrane until liquid appears in the vent hole. Maintain pressure.
-
Remove the syringe (if used again) and close the opening with a bleed screw.
-
Turn the unit so the membrane faces upwards and the hole is horizontal.
Step 6: Final Check
-
Wipe the housing and bleed screws until dry.
-
Press the membrane firmly for several seconds and check the housing for leaks.
